- Introduction:
- Any money received by a business is considered a receipt.
- Before recording a receipt, ensure at least one cash or bank account is established.
- Accessing the Receipts Tab:
- Navigate to the Receipts tab in ElevateBooks.
- Click on “New Receipt” to start recording a new transaction.
- Filling in Basic Information:
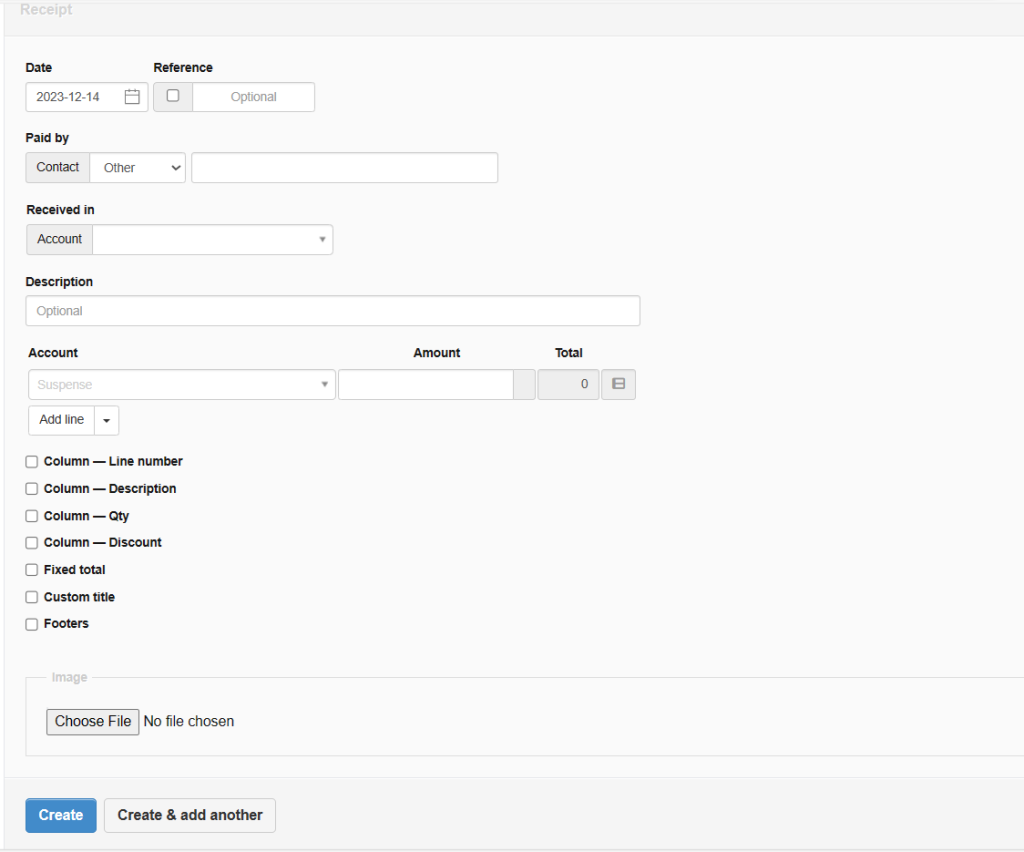
- The date is automatically set to today but can be edited.
- Reference (optional): Can be used for cheque numbers, bank confirmation numbers, or other internal sequences.
- “Paid by”: Identify the person or entity from whom money is received. Choose between “Other,” “Customer,” or “Supplier.”
- Selecting the Receiving Account:
- Choose the bank or cash account where the money is being received.
- If a bank account is selected, specify the clearance date.
- Additional Details:
- Description: Provide an optional summary of the transaction.
- Item Field: For predefined inventory or non-inventory items.
- Account: Select the account to post the receipt.
- Description on Line Items: Add specific information if needed.
- Quantity and Pricing:
- Qty: Enter the quantity of goods or services (defaults to 1 if left blank).
- Unit Price: Lists the price of a single unit or the entire amount for the line item.
- Tax Codes and Other Fields:
- Tax Code: Select if applicable.
- Division and Project: If defined and applicable.
- Inventory Location: If inventory locations are defined and applicable.
- Tax Calculation:
- Check or uncheck “Amounts are tax exclusive” based on whether taxes are included in unit prices.
- Discounts and Themes:
- Apply Percentage or Exact amount discounts if needed.
- Choose a Custom theme or enter a Custom title if desired.
- Display Preferences:
- Control the display of tax amounts for individual line items.
- Saving the Receipt:
- Click “Create” to save the receipt.